
Table of Contents
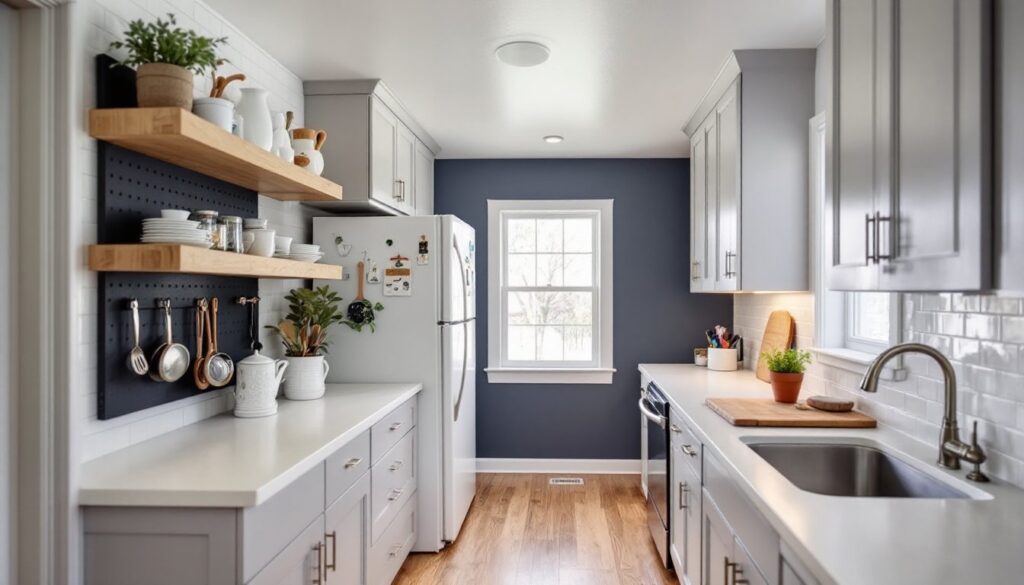
ToggleGalley kitchens, those long, narrow corridors flanked by counters and cabinets, get a bad rap. They’re cramped, inefficient, and rarely win design awards. But with tight constraints come creative opportunities, especially when working within a budget. Instead of tearing down walls or replacing every surface, strategic upgrades can turn a claustrophobic galley into a surprisingly functional workspace. The goal isn’t to add square footage: it’s to maximize light, storage, and visual flow without draining savings accounts. Whether facing dingy cabinets, dim lighting, or wasted vertical space, a few targeted improvements can make the difference between tolerating a kitchen and actually enjoying it.
Key Takeaways
- Small galley kitchen ideas on a budget prioritize maximizing vertical storage with floating shelves and pegboard, which cost as little as $8–$12 per linear foot and turn wasted wall space into functional zones.
- Paint is the highest-impact upgrade per dollar spent; using light colors on walls and strategic accent colors on end walls can visually expand the narrow space while semi-gloss finishes reflect more light and resist moisture.
- Refresh existing cabinets with new hardware ($2–$8 per piece) and paint using bonding primers, which costs under $50 in materials and saves thousands compared to full cabinet replacement.
- Under-cabinet LED lighting installed in an afternoon ($20–$40) dramatically improves usability by eliminating shadows and making countertops more visible without requiring professional electrical work.
- Budget-friendly backsplash alternatives like peel-and-stick tiles ($8–$15 per square foot) or traditional ceramic tile ($0.50–$2 per square foot) deliver a polished look in a weekend while remaining renter-friendly and removable.
Maximize Storage with Clever Vertical Solutions
Galley kitchens waste vertical real estate. That blank wall above the counter or the gap between cabinets and ceiling? Unused space that could hold cookware, pantry items, or everyday dishes.
Open shelving costs a fraction of custom cabinetry. Mount 12-inch-deep floating shelves (using heavy-duty brackets rated for at least 50 pounds) along bare walls to store frequently used items. Use stainless steel brackets for a modern look or simple L-brackets painted to match the wall for a cleaner line. Stain-grade pine runs about $8–$12 per linear foot at most home centers: primed MDF costs even less but needs sealing if near the sink.
Magnetic knife strips and pegboard panels turn dead zones into active storage. A 24-inch pegboard section (¼-inch tempered hardboard, around $10 for a 4×8 sheet) mounted behind the stove or beside the fridge holds utensils, measuring cups, and small pots. Paint it the same color as the wall or go bold with a contrasting accent.
For cabinets that don’t reach the ceiling, add a second row of simple boxes or baskets on top. Wicker, wire, or fabric bins corral seasonal items and small appliances without requiring custom carpentry. Just make sure the top of the existing cabinets can support the added weight, most frameless cabinets have a ¾-inch particleboard or plywood top that handles light loads fine.
Sliding drawer organizers and pull-out pantry racks retrofit into existing base cabinets without major surgery. Kits start around $30–$60 and install with a drill and four screws per unit. They’re especially useful in narrow galleys where deep cabinets become black holes.
Paint and Color Tricks to Expand Your Space
Paint delivers the biggest visual impact per dollar spent, and in a galley kitchen, color choices directly affect how narrow the space feels.
White or near-white walls reflect light and push walls outward, at least perceptually. Semi-gloss or satin finishes bounce more light than flat paint and wipe clean easier, critical near cooktops and sinks. One gallon of quality interior paint covers roughly 350–400 square feet: most galley kitchens need less than two gallons for walls and ceiling.
Painting cabinets the same color as walls creates a seamless backdrop, reducing visual clutter. Light grays (like Sherwin-Williams Repose Gray or Benjamin Moore Revere Pewter) offer warmth without closing in the space. Avoid stark white on cabinets if appliances are off-white or almond, mismatched whites look sloppy.
For a bolder approach, paint the end wall (the short wall at one end of the galley) a darker or saturated color. This draws the eye forward and makes the kitchen feel less tunnel-like. Deep navy, charcoal, or even a muted terracotta works. Keep side walls light to maintain width.
Glossy finishes on trim, cabinet doors, or backsplash areas amplify available light. High-gloss paint on cabinet doors requires more prep, sand to 220-grit, prime with a bonding primer like Zinsser B-I-N or Kilz Adhesion, then apply two thin topcoats. It’s labor-intensive but costs under $50 in materials for an average galley.
Many small-space design ideas emphasize tone-on-tone palettes to unify tight areas, and galley kitchens prove the strategy works. Monochrome doesn’t mean boring: texture, hardware, and lighting add depth.
Budget-Friendly Cabinet and Hardware Updates
Replacing cabinets eats up 30–40% of a typical kitchen remodel budget. Refreshing what’s already there saves thousands and still transforms the look.
Refresh Cabinet Doors Without Replacing Them
If cabinet boxes are structurally sound but doors look dated, paint or stain them instead of buying new. Remove doors and hardware, label each hinge location with painter’s tape, and work in a ventilated area or garage.
For laminate or melamine doors, use a bonding primer (Zinsser B-I-N shellac-based or Kilz Adhesion) after a light scuff-sand with 150-grit paper. Skip the deglosser products, they’re inconsistent. Two coats of semi-gloss or satin latex paint over primer create a durable finish. Let each coat cure 24 hours before rehanging.
For wood veneer or solid wood doors, sand with 120-grit, then 220-grit. Wipe with a tack cloth and apply stain or paint. If keeping a natural wood look, a fresh coat of polyurethane (water-based for low odor, oil-based for durability) revives faded finishes.
New hardware is the fastest facelift. Swapping builder-grade knobs for brushed nickel, matte black, or brass pulls takes minutes per door and costs $2–$8 per piece. Measure the center-to-center distance of existing holes before buying pulls, common sizes are 3 inches or 3.75 inches (96mm). If switching from knobs to pulls and the hole spacing doesn’t match, fill old holes with wood filler, sand smooth, and drill new ones. A template jig (around $15) ensures consistent placement.
Consider removing a few upper cabinet doors entirely to create open shelving. It’s free, opens sight lines, and works especially well on one side of a galley to break up the corridor effect. Just make sure the shelves inside are finished or paint them to match the walls.
Smart Lighting Upgrades That Make a Big Impact
Galley kitchens often suffer from a single overhead fixture that casts shadows exactly where they’re not needed, on countertops and cooktops.
Under-cabinet lighting transforms usability. LED strip lights or puck lights install in an afternoon and run on plug-in transformers or hardwire into existing circuits. Plug-in LED strips (about $20–$40 for a 6-foot run) stick to the underside of upper cabinets with adhesive backing. Route the cord behind the cabinet or down to an outlet near the counter. Hardwired options look cleaner but require basic electrical work, if uncomfortable splicing into a junction box, hire an electrician for $100–$150.
Choose warm white LEDs (2700–3000K color temperature) to avoid the cold, clinical look of daylight bulbs. Under-cabinet lighting highlights backsplashes and countertops, making the kitchen feel larger and more intentional.
Replace the overhead fixture with a flush-mount LED that distributes light more evenly. Many budget-friendly options at big-box stores offer 1500–2000 lumens for under $40, enough for most galley kitchens. If the existing fixture uses a standard round junction box, installation is a straightforward swap, turn off the breaker, disconnect the old fixture, connect black to black, white to white, ground to ground, and mount the new one. Always verify power is off with a non-contact voltage tester before touching wires.
For renters or those avoiding electrical work, battery-operated puck lights with motion sensors stick inside cabinets or pantries. They’re not a replacement for task lighting but add convenience for under $15 per three-pack.
Proven small kitchen upgrades often prioritize lighting precisely because it’s affordable and immediately noticeable.
Affordable Countertop and Backsplash Makeovers
Countertops and backsplashes anchor a kitchen’s aesthetic, but full replacements run into four figures. Budget alternatives exist that hold up under normal use.
Countertop paint kits (like Giani or Rust-Oleum) mimic granite or marble for $70–$100. They work best on laminate counters and involve multiple coats of base, pattern, and sealer applied with sponges and brushes. The finish isn’t as durable as stone, but it buys time and handles light prep work. Avoid cutting directly on painted surfaces, use cutting boards.
Peel-and-stick vinyl tiles or contact paper offer temporary solutions for renters. Quality vinyl tile (not the paper-thin stuff) costs $1–$2 per square foot and adheres to clean, dry laminate. It won’t fool anyone up close, but from a few feet away, patterns like faux marble or butcher block improve the look.
For backsplashes, peel-and-stick tile has improved dramatically. Brands like Smart Tiles or Tic Tac Tiles offer gel-backed, dimensional tiles that mimic subway, mosaic, or stone for $8–$15 per square foot. Clean the wall thoroughly (TSP works well), let it dry, and press tiles into place. They’re removable, making them renter-friendly, though adhesive strength varies, expect some tiles to need re-pressing over time.
Traditional ceramic subway tile remains a budget staple at $0.50–$2 per square foot. A 4×8-foot backsplash needs roughly 32 square feet of tile. With thinset mortar, grout, and basic tools (notched trowel, tile spacers, grout float), the material cost stays under $100. Installation requires patience and a level hand, but it’s a common first-time tiling project. Rent a tile cutter for $20–$30 if dealing with outlets or corners.
Many budget makeover projects showcase peel-and-stick backsplashes as a fast win, especially in rentals or homes staged for sale.
Safety note: Wear nitrile gloves and safety glasses when mixing thinset or grout, both are caustic and irritating to skin and eyes.
Conclusion
Galley kitchens don’t have to feel like afterthoughts. Strategic paint, smart storage, updated hardware, and improved lighting shift the entire experience without requiring a gut renovation or a contractor’s invoice. Most of these projects fit into weekends and modest budgets, delivering visible returns that make daily cooking less frustrating. Start with the upgrade that solves the biggest pain point, whether that’s dark corners, cluttered counters, or dated cabinets, and build from there.