
Table of Contents
ToggleScorching sun can turn a perfectly good patio into an unusable dead zone for half the day. But quality shade doesn’t require a five-figure pergola or a professional installation. With some creativity, basic DIY skills, and materials that won’t wreck your budget, homeowners can drop outdoor temperatures by 10–20°F and extend their usable living space without financing a second mortgage. This guide covers practical, tested shade solutions ranging from $20 fabric hacks to sub-$500 structures, all sized for real backyards and real budgets.
Key Takeaways
- Inexpensive patio shade ideas can reduce surface temperatures by 20–30°F and lower cooling costs by 15–25%, while costing as little as $20 to $500 for DIY solutions.
- Shade sails offer the most cost-effective coverage at $50–$200 using existing anchor points, with easy installation and visually striking results comparable to professional options.
- Repurposed materials like wooden pallets, bamboo fencing, and reclaimed metal roofing transform thrift finds into functional shade structures for minimal additional investment.
- Market umbrellas and offset canopies provide instant, portable shade starting at $60–$80, though weighted bases and proper anchoring are essential for safety and stability.
- Living shade from vines, container trees, and vertical gardens delivers long-term cooling and privacy, though annuals cover faster (8–12 weeks) while perennials require 2–3 years to mature.
- A basic 10×10 ft pergola DIY project costs $300–$800 in materials and takes a weekend to build, with lattice upgrades adding flexible shade without permanent structural changes.
Why Patio Shade Matters for Comfort and Savings
Direct sun exposure heats concrete, pavers, and composite decking to surface temperatures exceeding 140°F on summer afternoons. That radiant heat makes outdoor furniture uncomfortable and drives up cooling costs when heat radiates into adjacent interior rooms through sliding doors and windows.
Adequate shade reduces surface temperatures by 20–30°F, extends the life of outdoor furniture and cushions (UV is the primary cause of fabric degradation), and cuts air conditioning runtime by blocking solar heat gain. According to the Department of Energy, strategic shading can reduce cooling costs by 15–25% in hot climates.
Beyond energy savings, shade makes outdoor spaces functional during peak daylight hours, critical for families with young children, outdoor dining, or anyone working from a patio desk. The right shade solution also increases property value and curb appeal without the permanent commitment or permit requirements of built structures.
DIY Sail Shade Solutions
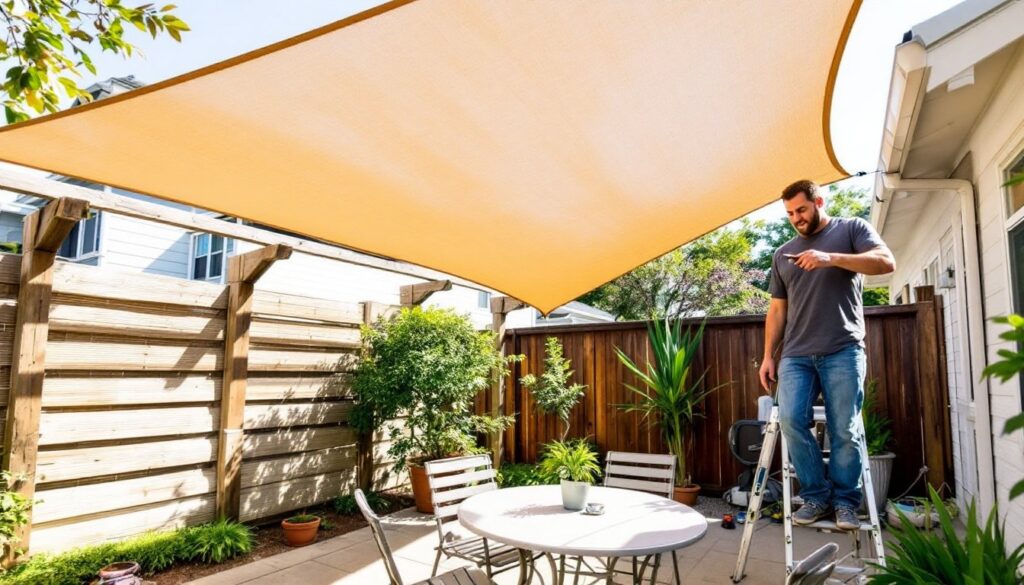
Shade sails are tensioned fabric panels anchored at three or four corners, mimicking the look of a ship’s sail. They’re one of the most cost-effective and visually striking options for patio coverage.
Materials: UV-rated polyethylene or PVC fabric sails run $30–$120 depending on size (10×10 ft to 16×20 ft). Pre-made sails include grommets and are available in triangle, square, and rectangle configurations. You’ll also need anchor hardware: stainless steel eye bolts, turnbuckles for tensioning, and either existing posts, wall-mounted brackets, or 4×4 pressure-treated posts set in concrete.
Installation steps:
- Identify anchor points at least 8–10 feet apart. Existing pergola posts, sturdy fence posts, or house fascia work if properly rated for lateral load (minimum 200 lbs per anchor).
- Install eye bolts into solid wood (joists, posts, or blocking), not just siding or trim. Pre-drill to avoid splitting. For new posts, dig 24–30 inches deep, set in quick-setting concrete, and allow 48 hours to cure.
- Attach turnbuckles to each corner, then clip or loop the sail grommets onto the turnbuckles.
- Tension gradually, alternating corners to achieve a taut, wrinkle-free surface. The sail should be angled 20–30° for water runoff.
Pro tip: Leave a 6–12 inch gap between the sail edge and anchor points: overtightening causes fabric fatigue and hardware failure. If installing near a roofline, ensure the sail doesn’t create a water dam that directs runoff into siding or foundation.
Cost: $50–$200 for a single sail setup using existing anchor points: add $100–$300 if setting new posts.
Repurposed and Upcycled Shade Structures
Scrap materials and secondhand finds often outperform new products for DIYers willing to get creative. Old pallets, reclaimed doors, metal roofing scraps, and even bamboo fencing can be assembled into functional shade with minimal cash outlay.
Pallet pergola toppers: Standard 40×48 inch pallets laid across existing patio framing (or simple 4×4 posts) create instant lattice-style shade. Sand rough edges, apply exterior stain or sealer, and secure with 3-inch deck screws or galvanized joist hangers. Two to four pallets cover a typical 8×10 ft seating area. Cost: $0–$40 if pallets are free: add $60 for posts and fasteners.
Bamboo roll fencing: Sold in 6 ft × 8 ft rolls at home centers for $25–$50, bamboo fencing can be stapled or zip-tied to a simple 2×4 frame and suspended from chains or paracord. It filters about 60% of direct sun and adds a tropical aesthetic. Pair it with outdoor curtain rods for easy seasonal removal.
Metal roofing offcuts: Corrugated steel or aluminum panels (often available as contractor surplus for $1–$2 per linear foot) can be screwed to a wood frame to create a permanent, weather-proof roof. Use neoprene washers under screws to prevent leaks. This approach requires basic carpentry but delivers a structure that’ll last 20+ years.
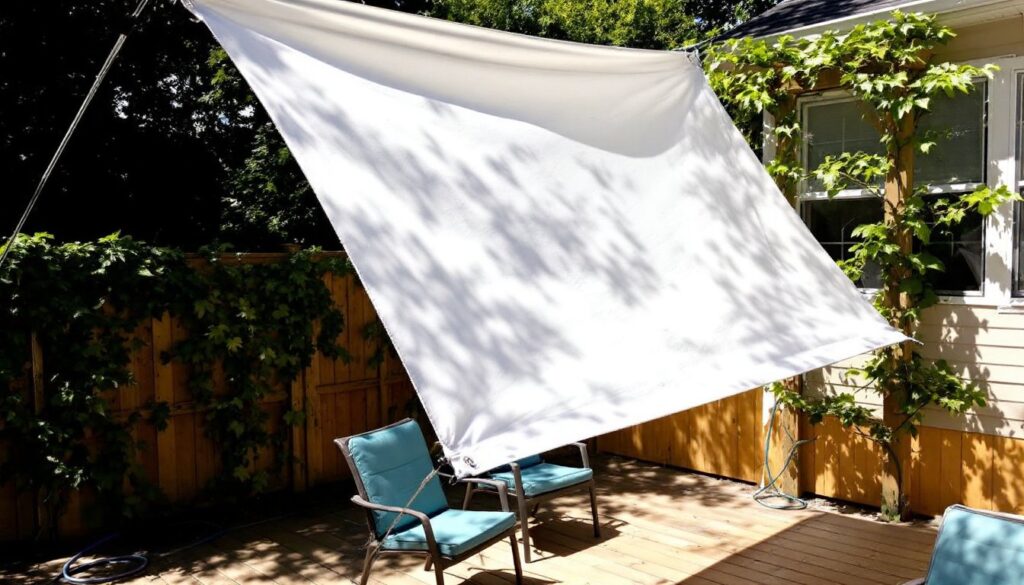
Old Sheets, Curtains, and Fabric Panels
Outdoor curtains made from repurposed indoor drapes, canvas drop cloths, or thrift-store bed sheets provide flexible, movable shade that’s ideal for renters or temporary setups. Outdoor enthusiasts increasingly turn to creative privacy solutions to shield patios from sun and neighbors alike.
Installation: Mount a galvanized pipe or vinyl-coated cable between two posts or under an eave using screw-in eye hooks and cable clamps. Thread curtain rings or use fabric tabs sewn or clipped onto the fabric. Canvas drop cloths (9×12 ft, $15–$25 at hardware stores) work surprisingly well, they’re durable, paintable, and UV-tolerant for 2–3 seasons.
Weather note: Unless treated with waterproofing spray, fabric panels will mildew in humid climates. Take them down during prolonged rain or apply a fabric sealer like Thompson’s Water Seal Fabric Guard.
Cost: $20–$60 for hardware and fabric.
Affordable Umbrella and Canopy Options
Market umbrellas (the kind with a center pole and 7–11 ft canopy) are the fastest shade solution, requiring zero installation. Budget models start around $40–$80, but they tip in wind and fade quickly. Look for models with aluminum poles (lighter and rust-proof), vented canopies (reduces wind lift), and Sunbrella or polyester fabric rated 280+ gsm (grams per square meter) for UV durability.
Weighted bases are critical. A 9 ft umbrella needs at least a 50 lb base: 11 ft umbrellas require 75+ lbs. Hollow bases filled with sand or water work but crack in freezing temps. Concrete-filled or cast-iron bases last longer.
Offset (cantilever) umbrellas provide shade without a center pole obstructing table space. Budget cantilever models ($120–$250) use a side-mounted pole and crank-operated tilt. They’re more prone to tipping than center-pole designs, so add extra base weight or stake the base into soil.
Pop-up canopies: The 10×10 ft folding canopies sold for tailgating ($60–$150) work for patios but aren’t built for permanent outdoor use. Frames rust, fabric tears, and they become projectiles in storms. If using one, anchor all four legs with screw-in ground anchors or concrete weights, and take the canopy down when not in use.
Cost: $60–$250 depending on size and quality.
Natural Shade from Plants and Greenery
Living shade delivers cooling, privacy, and habitat, but it requires patience and upkeep. Fast-growing vines, container trees, and vertical planters can reduce patio temperatures faster than most people expect.
Vine-covered trellises: Build or buy a simple trellis frame (wood or powder-coated steel) and plant vigorous climbers like wisteria, trumpet vine, passionflower, or annual morning glory. Perennial vines take 2–3 seasons to fill in: annuals deliver coverage in 8–12 weeks. A 4×8 ft trellis costs $30–$80 in materials (or free from salvaged lattice).
Container trees: Dwarf or semi-dwarf trees in large pots (20–30 gallon fabric grow bags or resin planters) can be positioned to block afternoon sun. Good candidates include Japanese maple, crape myrtle, olive, and citrus (in warm zones). Trees in containers need consistent watering and root-pruning every 3–5 years. Expect $50–$150 per tree plus $30–$60 per container.
Vertical gardens: Wall-mounted pocket planters or pallet gardens planted with trailing succulents, ferns, or grasses create living privacy screens that filter light. These work best on east- or north-facing walls where they won’t scorch. Many outdoor gardening ideas emphasize vertical plantings for small-space patios.
Shade timeline: Annuals provide shade the first season. Perennials and vines deliver full coverage in year two or three. Trees take 3–5 years to cast meaningful shade.
Cost: $40–$200 depending on plant selection and container size.
Budget-Friendly Pergola and Lattice Upgrades
A basic pergola frame, horizontal beams (rafters) supported by vertical posts, costs $300–$800 in materials for a 10×10 ft structure if built from pressure-treated 4×4 and 2×6 lumber. It’s a weekend project for two people with intermediate carpentry skills, a miter saw, drill, and post-hole digger.
Key steps:
- Dig post holes 24–30 inches deep, spaced 8–10 ft apart. Set posts in concrete: use a level and temporary bracing to hold plumb while curing.
- Attach beams to post tops using galvanized hurricane ties or notched joints secured with ½-inch carriage bolts.
- Lay rafters (2×6 or 2×4 boards) across the beams at 16–24 inch spacing. Secure with 3-inch deck screws or joist hangers.
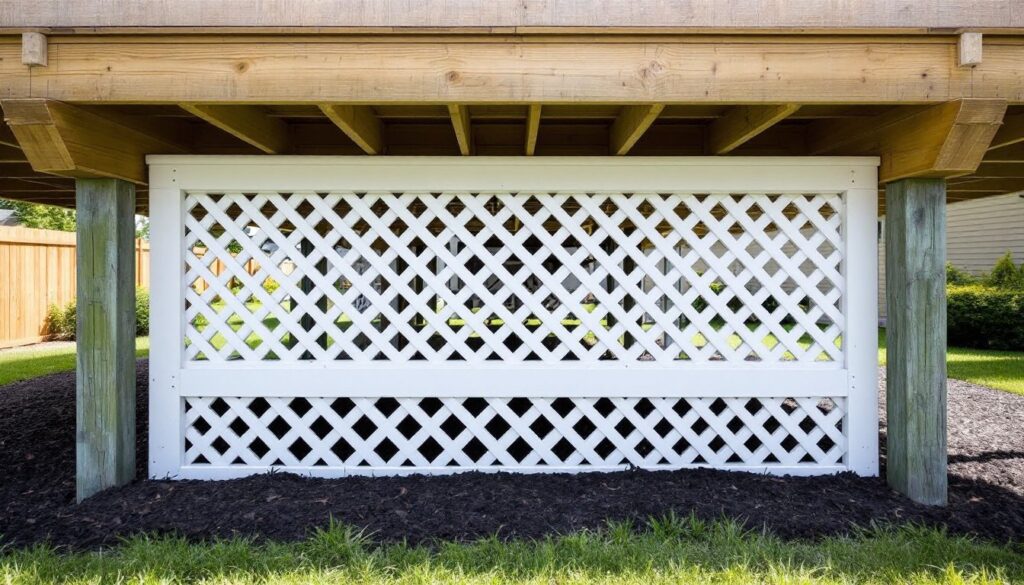
- Add lattice panels or slats on top for increased shade. Lattice adds 30–50% shade depending on spacing.
Check local codes: Some jurisdictions require permits for structures over 120 sq ft or anything anchored to a house. Pergolas attached to roof framing need ledger boards lag-bolted into rim joists (not siding), and may require engineered drawings.
Lattice upgrade for existing structures: If you already have a pergola or arbor, adding roll-out reed fencing, exterior-grade lattice panels (4×8 ft sheets, $20–$40), or removable fabric canopy tracks increases shade without permanent modification. Many homeowners explore patio improvement techniques that balance aesthetics and function.
Cost: $300–$800 DIY for a basic wood pergola: $50–$150 for lattice or fabric add-ons.
Safety notes: Wear safety glasses and hearing protection when cutting lumber. Use a cordless drill with a clutch to avoid overdriving screws into structural connections. If digging near utilities, call 811 for a free locate service before breaking ground.