
Table of Contents
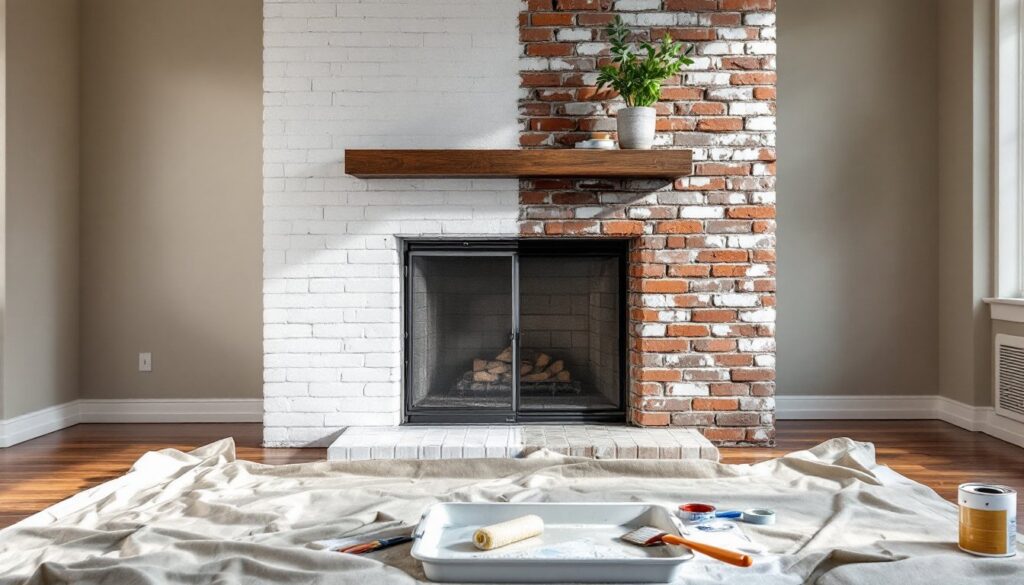
ToggleA dated, discolored fireplace can drag down an entire room, but a fresh coat of paint can flip the script without demolition or serious cash outlay. Whether you’re working with brick, stone veneer, or a builder-grade mantel, paint offers a fast, reversible way to modernize your hearth and shift the style from farmhouse to contemporary or anywhere in between. This guide walks through proven color schemes, application techniques, and prep steps to help homeowners tackle fireplace painting with confidence. Expect honest talk about surface challenges, product selection, and when to call it quits on a DIY approach.
Key Takeaways
- Fireplace paint ideas offer a fast, reversible way to modernize your hearth and seal porous masonry without costly demolition or serious cash outlay.
- Always match paint type to surface: use high-heat paint (1200°F+) for active fireboxes, acrylic latex masonry paint for surrounds, and stain-blocking primer for soot-damaged brick.
- Classic whites and warm neutrals like Benjamin Moore Simply White and Sherwin-Williams Accessible Beige create a clean backdrop, while bold colors like matte black and navy turn the fireplace into a dramatic focal point.
- Two-tone and accent techniques—such as painting mortar joints in contrasting colors or highlighting just the firebox interior—add visual interest without requiring advanced painting skill.
- Proper prep work determines paint longevity: thoroughly clean brick with TSP, repair damaged mortar, apply primer, and allow 48 hours drying time before painting to prevent peeling and failure.
- Avoid lighting fires for 72 hours after painting and let the final coat cure for up to 30 days to ensure durability and safety.
Why Paint Your Fireplace? Benefits Beyond Aesthetics
Painting a fireplace delivers immediate visual impact, but the benefits extend further than curb appeal. A well-executed paint job can seal porous masonry, reducing dust and efflorescence (that white powdery residue that leaches through brick). It also unifies mismatched materials, common in remodels where new stone or tile meets old brick.
From a resale perspective, a clean, cohesive fireplace reads as intentional design rather than deferred maintenance. Buyers notice. Paint also lets homeowners test bold color without the commitment of tile or stone replacement, and if trends shift, a repaint is far cheaper than a tearout.
Finally, painting can improve fire safety compliance when paired with the correct high-heat products. Standard latex won’t cut it in a firebox, but heat-resistant coatings can refresh stained interiors and improve reflectivity for better heat distribution.
Choosing the Right Paint for Your Fireplace Type
Not all fireplace surfaces tolerate the same coatings, and using the wrong product leads to peeling, discoloration, or worse, toxic offgassing under heat.
For active fireboxes (wood-burning or gas): Use only high-heat paint rated to 1200°F minimum. These are typically silicone-based or epoxy-modified alkyd formulas sold in spray cans. Standard latex or acrylic will blister and fail. If the firebox has heavy creosote buildup, clean with a dedicated creosote remover first, paint won’t adhere to oily residue.
For surrounds and mantels (brick, stone, or wood that don’t see direct flame): Acrylic latex masonry primer followed by 100% acrylic latex paint works well. Look for products labeled for masonry or “high-adhesion” to handle the alkalinity and texture of brick or stone. Sherwin-Williams Loxon and Benjamin Moore Fresh Start are solid choices.
For non-functioning or decorative fireplaces: Standard interior paint is fine, but a stain-blocking primer (oil-based or shellac-based) is critical if the brick has soot staining or water damage. Zinsser B-I-N or Kilz Original will lock in stains that water-based primers can’t touch.
Avoid chalk paint or milk paint on high-traffic surrounds, they’re trendy but require wax topcoats that attract dust and don’t hold up to heat or cleaning.
Classic White and Neutral Fireplace Paint Ideas
White remains the workhorse color for fireplace updates, especially in spaces where the hearth competes with bold furnishings or architectural details. A crisp white like Benjamin Moore Simply White (OC-117) or Sherwin-Williams Pure White (SW 7005) creates a gallery-like backdrop and reflects light into darker rooms.
For warmer neutrals, Accessible Beige (SW 7036) or Revere Pewter (HC-172) soften red brick without turning the room builder-grade tan. These shades work well in open-concept spaces where the fireplace needs to tie into adjacent wall colors.
Off-whites and greiges are popular in 2026 for good reason: they hide dust better than stark white and pair with both warm wood tones and cool metal finishes. When painting brick, expect to apply two to three coats for full opacity, brick is thirsty, and the mortar joints soak up paint unevenly.
One technique gaining traction on budget renovation projects is the German schmear or mortar wash, which layers thinned white paint or actual mortar over brick for a textured, Old World look. It’s more involved than straight painting but delivers serious character.
Bold and Dramatic Fireplace Color Schemes
Dark, saturated colors turn a fireplace into a true focal point, but they demand commitment and good lighting. Matte black is the most common bold move, especially in modern or industrial interiors. Use a dead-flat finish like Benjamin Moore’s Advance in Black or Sherwin-Williams Tricorn Black (SW 6258) to avoid sheen inconsistencies on textured brick.
Black works best when the room has high ceilings, ample natural light, or contrasting trim. In smaller, darker rooms, black can feel oppressive. Test with a sample board propped against the fireplace for a few days before committing.
Deep navy, charcoal, and forest green offer drama with slightly more warmth. Hale Navy (HC-154) and Studio Green (SW 0047) have shown up frequently in paint color guides for 2026. These tones pair well with brass or aged bronze fireplace screens and tools.
For a less permanent approach, consider painting just the firebox interior in a contrasting dark color while keeping the surround neutral. This highlights the opening and adds depth without overwhelming the room.
One caution: avoid painting natural stone (like stacked ledgestone or river rock) in bold colors unless you’re certain. Stone has intrinsic texture and variation that paint often flattens, stick to brick or smooth masonry for dark hues.
Two-Tone and Accent Fireplace Painting Techniques
Two-tone fireplaces add visual interest without requiring advanced skill, just careful taping and planning. The most common split is white or light surround with a dark mantel, which grounds the feature and highlights architectural detail.
Another approach: paint the brick or stone one color and the mortar joints another. This is labor-intensive but striking. Use a small artist’s brush to paint mortar lines in a contrasting shade (white mortar with gray brick, or dark mortar with cream brick). Expect this to take several hours on a standard fireplace.
Ombré or gradient techniques (light at the top fading to dark at the hearth) have appeared in DIY furniture projects and translate well to vertical brick surfaces. Use a paint sprayer or sponge to blend tones, working in sections and feathering edges before the paint dries.
For accent work, consider painting just the inner firebox surround (the area framing the opening) in a bold color, leaving the outer brick neutral. This creates a modern, layered look without committing the entire wall.
Stenciling or hand-painted patterns (geometric shapes, faux tile, or brick “whitewashing” with irregular coverage) add custom detail. Use FrogTape or a stencil adhesive to keep lines sharp, and seal with a clear matte topcoat if the area sees hand contact.
Preparing and Painting Your Fireplace: Essential Steps
Prep determines whether paint lasts two years or twenty. Skimp here, and you’ll be repainting by next season.
Materials and Tools
- Masonry primer (acrylic or oil-based, depending on staining)
- Acrylic latex paint or high-heat paint (for firebox)
- Wire brush and TSP (trisodium phosphate) cleaner
- Painter’s tape (2-inch FrogTape for brick)
- Roller with 3/4-inch nap (for brick texture)
- Angled brush (2-inch for mortar joints and detail)
- Drop cloths, N95 respirator, safety goggles, and nitrile gloves
Step-by-Step Process
-
Clean the surface thoroughly. Scrub brick with a wire brush to remove loose mortar, soot, and efflorescence. Mix TSP per package directions (typically 1/2 cup per gallon of water) and scrub with a stiff brush. Rinse and let dry 48 hours minimum. Brick holds moisture, paint applied over damp masonry will fail.
-
Repair damaged mortar. If joints are crumbling, repoint them with Type N mortar before painting. Let mortar cure for 7 days.
-
Apply stain-blocking primer. Use a roller for large areas and an angled brush for joints. On porous brick, expect to use 1 gallon per 200 square feet (versus 400 sq ft on drywall). Let primer dry per label, usually 4 hours for latex, 24 for oil-based.
-
Paint in thin, even coats. Apply the first coat with a roller, working paint into joints with a stippling motion. Follow with a second coat after 4 hours. For deep texture, a third coat may be needed. Don’t overload the roller, drips in mortar joints are a pain to fix.
-
Protect and cure. Keep the room well-ventilated and avoid lighting fires for 72 hours after the final coat, even if using high-heat paint. Full cure takes up to 30 days.
Safety Notes
- Wear an N95 respirator when cleaning or priming, TSP and oil-based primers emit fumes.
- Protect floors with canvas drop cloths, not plastic (paint-soaked plastic is slippery).
- If stripping old paint, test for lead first. Homes built before 1978 often have lead paint: disturbing it requires EPA-certified remediation in some states.
This process applies to surrounds and mantels. For active fireboxes, skip the TSP (it’s flammable residue) and use a dedicated creosote cleaner, then apply high-heat paint per the manufacturer’s instructions, most require curing fires at incrementally higher temps.
Conclusion
Fireplace painting is one of the highest-impact, lowest-cost updates a homeowner can tackle in a weekend. Whether going neutral to blend in or bold to stand out, the key is matching the right product to the surface and respecting the prep work. Don’t rush drying times, and don’t cheap out on primer. Done right, a painted fireplace resets a room’s tone and buys years before a bigger remodel becomes necessary.