
Table of Contents
TogglePavers offer one of the most versatile canvases for outdoor living. Unlike poured concrete, they can handle freeze-thaw cycles without cracking, and if one gets stained or damaged, it’s easy to pop it out and replace it. Whether someone’s working with a narrow side yard or a sprawling backyard, paver patios deliver a finished look that stands up to foot traffic, weather, and time. This guide covers the design patterns, material choices, and layout tricks that turn a flat patch of yard into a functional outdoor room.
Key Takeaways
- Paver patios are more durable and repairable than poured concrete—they resist cracking from freeze-thaw cycles and allow individual damaged units to be replaced without replacing the entire surface.
- Popular paver patio design patterns like herringbone, basketweave, and circular layouts offer distinct visual and functional benefits, with herringbone providing maximum strength for high-traffic areas and circular designs creating dramatic focal points.
- Material choices range from affordable concrete pavers ($3–$6/sq ft) to premium natural stone like bluestone and travertine ($10–$25/sq ft), with mixing materials in contrasting colors adding visual interest without appearing cluttered.
- Design elements such as soldier-course borders, accent bands, and inlays define the patio edge and break up large spaces, while also serving structural functions like edge restraint to prevent creep.
- Small patios benefit from single patterns and light colors for an open feel, while large patios succeed with zoned designs using pattern or color shifts to create distinct functional areas for dining, fire pits, and lounging.
- DIY paver patio installation is achievable for motivated homeowners with proper tools (plate compactor, wet saw, level) and material planning, typically costing $8–$20/sq ft installed or roughly half that for DIY projects.
Why Choose Pavers for Your Patio?
Pavers beat poured concrete on two fronts: flexibility and repairability. Concrete slabs crack when the ground shifts or frost heaves. Pavers, laid on a compacted gravel base with sand joints, move slightly with the substrate and resist cracking. If tree roots lift a section or a paver chips, the homeowner can pull just those units and reset them.
They’re also DIY-friendly. A motivated homeowner with a plate compactor, level, and weekend can install a small patio. Larger jobs (anything over 200 square feet or with significant slope) benefit from a second pair of hands and maybe a skid steer for grading. No mixing concrete, no race against cure times.
From a design standpoint, pavers come in more profiles than any other hardscape material. Tumbled edges for an old-world look, smooth faces for modern layouts, permeable units for stormwater compliance. Standard sizes include 4″ × 8″, 6″ × 6″, 6″ × 9″, and 12″ × 12″ (all nominal), plus specialty shapes like fans, hexagons, and circles. That variety lets the homeowner create patterns and borders that poured concrete can’t match.
Popular Paver Patio Design Patterns
Herringbone and Basketweave Layouts
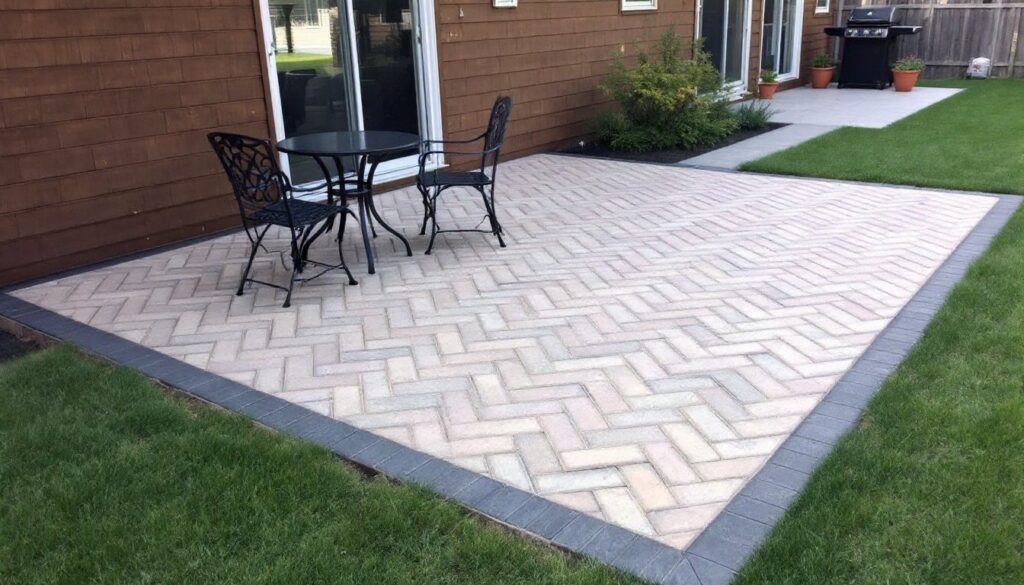
Herringbone locks pavers at 45° or 90° angles in a zigzag, creating one of the strongest interlocking patterns for driveways and high-traffic patios. It resists creep under lateral forces, which is why commercial plazas use it. For a backyard patio, herringbone adds visual interest and draws the eye diagonally, making narrow spaces feel wider. Use rectangular pavers (typically 4″ × 8″ or 3.5″ × 7.5″ actual) and be ready for more edge cuts than a running bond.
Basketweave pairs two pavers side-by-side, then two perpendicular, repeating the checkerboard. It’s faster to lay than herringbone, fewer angle cuts, easier to eyeball square, and works well with tumbled or antiqued pavers that hide small layout errors. Basketweave suits cottage-style or traditional homes. It does require square or near-square units: 6″ × 6″ and 8″ × 8″ pavers are common choices.
Circular and Curved Designs
Circular kits (usually 8- to 12-foot diameters) include pre-cut wedge pavers that radiate from a center stone. They make dramatic focal points for fire-pit patios or courtyard entries. Installation is straightforward: stake the center, snap chalk lines for the cardinal points, and work outward. The catch: circular patterns generate lots of edge waste where they meet a square border or lawn, so plan for 10–15% extra material.
Freeform curves require cutting pavers to follow the edge line. A wet-cut masonry saw or angle grinder with a diamond blade handles this: a guillotine splitter works for straight cuts but won’t follow curves. Curving the patio edge softens the transition to planting beds and feels less formal than straight lines. Mark the curve with a garden hose, then cut pavers to fit. Polymeric sand in the joints (discussed later) helps stabilize those custom-cut edges.
Color and Material Combinations That Wow
Concrete pavers dominate the market, affordable (often $3–$6 per square foot), consistent in size, and available in dozens of colors from charcoal to terracotta. Manufacturers tumble them, apply surface coatings, or mold textures that mimic natural stone. They’re the go-to for budget-conscious projects and handle sealing well for stain resistance.
Natural stone, bluestone, flagstone, travertine, granite, runs $10–$25 per square foot but delivers one-of-a-kind color variation and a premium feel. Bluestone in particular has become popular for modern patios: its blue-gray hue pairs well with steel planters and minimalist furniture. Travertine, with its pitted surface and warm beige tones, suits Mediterranean or resort-style backyards. Flagstone works for irregular, natural layouts where the homeowner wants gaps filled with moss or thyme. Many of these natural stone options show how texture and color shift across regions and quarries.
Mixing materials creates visual zones. A common trick: use a neutral gray or tan field color for the main patio, then introduce a contrasting border or accent band in charcoal, brick red, or buff. Two-tone layouts work best when colors share the same undertone (cool grays with blues, warm tans with reds). Avoid more than three colors: beyond that, the patio looks busy.
Permeable pavers deserve mention for eco-conscious builds. These units have wider joints or open cells that let rainwater drain into the subbase instead of running off into storm sewers. They’re required in some jurisdictions for patios over a certain size. Expect to pay 15–20% more than standard pavers and plan for a deeper gravel base (usually 8–12 inches of open-graded stone).
Incorporating Borders, Accents, and Inlays
A soldier course, pavers laid perpendicular to the field, frames the patio and defines the edge. It’s the simplest border, requires no special cuts (as long as dimensions work out), and gives the eye a stopping point. Run the soldier course in a contrasting color or a different paver size for extra definition.
Accent bands break up large expanses. On a 16′ × 20′ patio, a single row of darker pavers running parallel to the house every four feet adds rhythm. Bands work especially well in running-bond or stack-bond patterns where the lines are already straight. In herringbone or basketweave, accent bands disrupt the weave, so stick to borders.
Inlays, medallions, compasses, or monograms, require precision cutting and often a paper template. Some suppliers sell pre-cut kits: others offer custom CNC cutting for logos or house numbers. Budget $200–$800 for a simple medallion kit, plus installation time. Position inlays where they won’t be covered by furniture (center of a seating area or near the patio entrance).
Borders also serve a structural role. Pavers at the perimeter need edge restraint, plastic or aluminum edging staked into the subbase, to prevent creep. A double soldier course can act as built-in restraint if it’s wide enough and set in a mortar bed or against a concrete footing. Check manufacturer specs: some systems require mechanical edging regardless of border width.
Paver Patio Ideas for Small and Large Spaces
Small patios (under 120 sq ft): Stick to one pattern and one or two colors. Busy layouts shrink the space visually. Running bond in a light color opens things up. Diagonal installation (45° to the house) makes a narrow patio feel wider. Avoid bulky furniture: bistro sets and wall-mounted benches preserve floor area. If the patio abuts the house, step it down 6 inches below the door threshold to keep water and snow from breaching the sill (per IRC requirements).
Large patios (over 300 sq ft): Break the field into zones, dining, fire pit, lounging, using pattern or color shifts. A herringbone section near the grill transitions to a circular kit around the fire pit, then a simple running bond under the seating area. This approach gives each zone a sense of place without requiring walls or planters. Plan for at least one expansion joint every 20 feet if using rigid-set pavers (those with tight joints and polymeric sand). Flexible-set installations (wide joints, regular sand) handle movement better but weeds creep in.
Slope matters on any size patio. Grade away from the house at 1/4 inch per foot minimum (2% slope). On large patios, consider a center high point with dual slopes so water doesn’t pond. Use a 4-foot level and shims during base prep to check slope every few feet.
For cost planning, homeowners working with project estimators or renovation guides will find material costs range from $8–$20 per square foot installed, depending on paver type, site prep, and region. DIY cuts that roughly in half, assuming the homeowner already owns a plate compactor and wet saw or can rent them for a weekend.
Tool checklist for DIY install:
- Plate compactor (rent: $70–$100/day)
- Wet-cut masonry saw or angle grinder with diamond blade
- 4-foot level and string line
- Rake, shovel, wheelbarrow
- Rubber mallet
- Landscape fabric (under gravel base to suppress weeds)
- Safety gear: gloves, safety glasses, hearing protection, dust mask
Material list (for a 10′ × 12′ patio, 120 sq ft):
- Pavers: 130–135 sq ft (10% overage for cuts and breakage)
- Class II road base or crushed limestone: ~1.5 tons (4″ compacted base)
- Bedding sand: ~0.5 ton (1″ layer)
- Polymeric sand for joints: 1–2 bags (50 lb each)
- Edge restraint: 44 linear feet
Permits aren’t typically required for ground-level patios under 200 sq ft in most jurisdictions, but check local codes, especially if the patio is over a septic field, near a property line, or in a floodplain. Elevated patios or those requiring retaining walls over 4 feet often need engineered plans and inspections.